Continuing on from [our last post which created a simple blog app].
A blog without comments is just a website. So, let's add a way for users
to interact with our content.
First, as before, we need a database table. A comment on our blog will
need an ID, the date/time it was created, the author's name and e-mail
address, and the content of their comment. We will also need to store
the ID of the blog post the user is commenting on.
We add the SQL that builds this table as a new migration. When our app
starts up, Mojo::Pg will look to see
what version of the database schema we have. If necessary, it will
upgrade our database by running the migration SQL snippet.
@@ migrations
-- 1 up
CREATE TABLE blog (
    id SERIAL PRIMARY KEY,
    title VARCHAR NOT NULL,
    created TIMESTAMP NOT NULL DEFAULT NOW(),
    markdown TEXT NOT NULL,
    html TEXT NOT NULL
);
-- 1 down
DROP TABLE blog;
-- 2 up
CREATE TABLE blog_comment (
    id SERIAL PRIMARY KEY,
    blog_id INTEGER REFERENCES blog ON DELETE CASCADE,
    author_name VARCHAR NOT NULL,
    author_email VARCHAR NOT NULL,
    content TEXT NOT NULL
);
-- 2 down
DROP TABLE blog_comment;
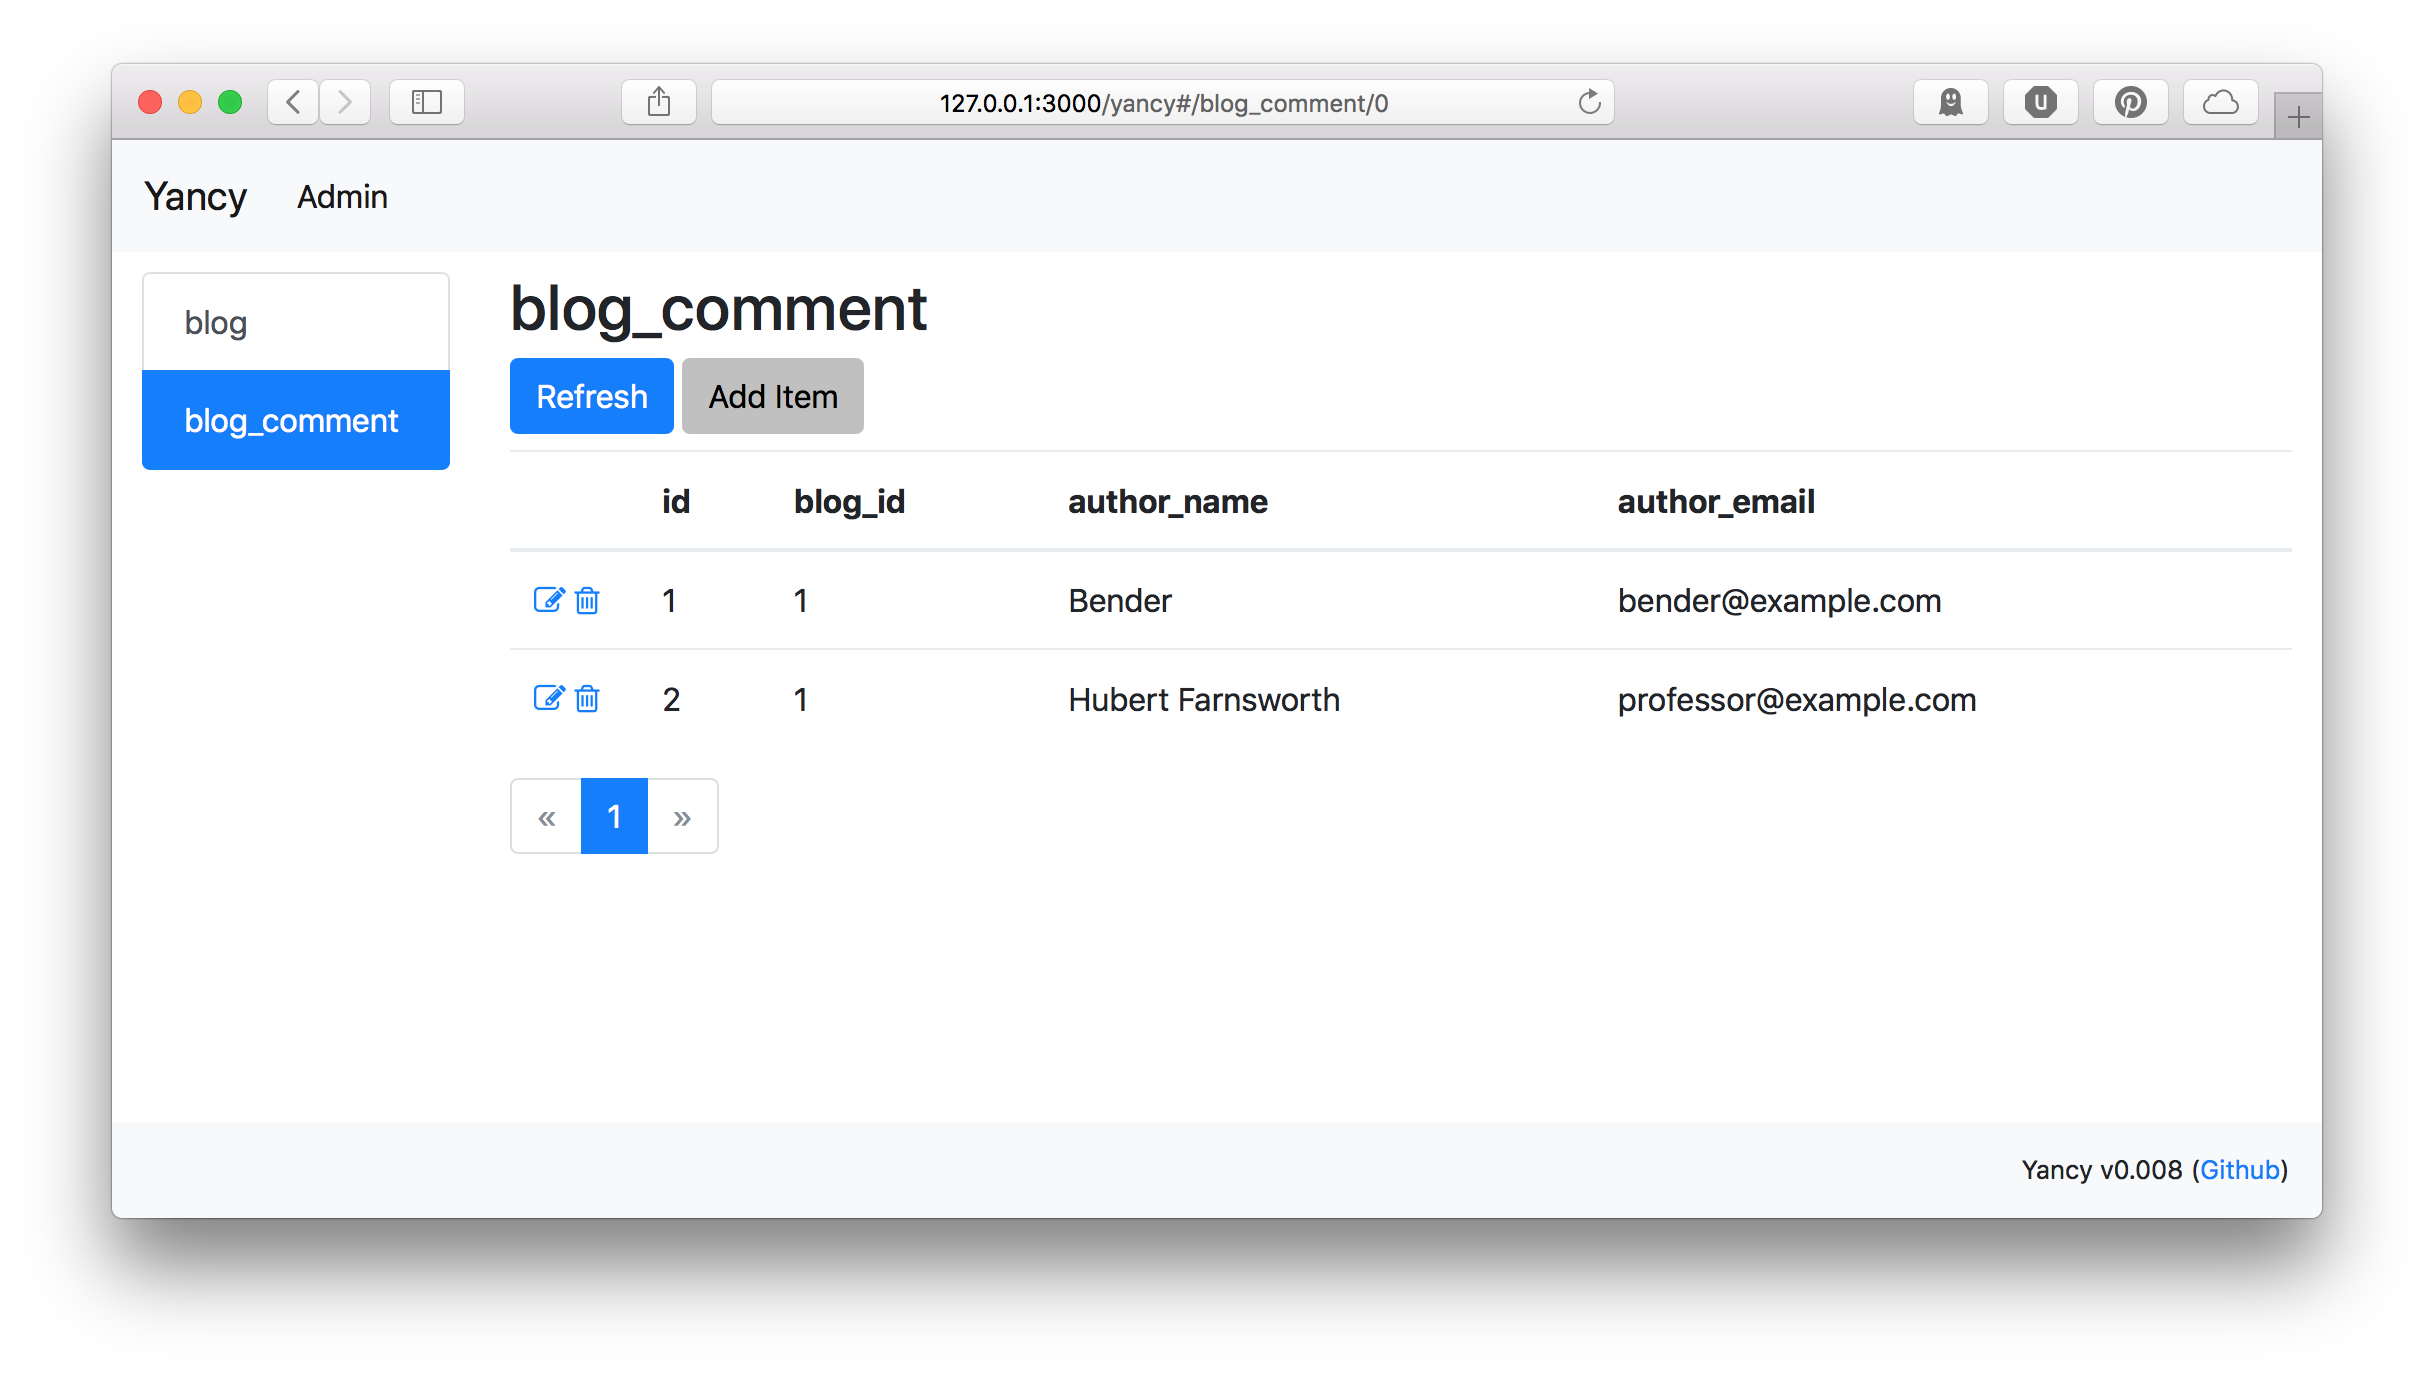
Now that we have a place to store them, we should tell Yancy about our
new collection so we can manage it. This won't be the way that users add
comments to our site, but it will be the way we edit and delete comments
from our site.
use Mojolicious::Lite;
plugin Yancy => {
    backend => 'pg://localhost/blog',
    collections => {
        blog_comment => {
            'x-list-columns' => [qw( id blog_id author_name author_email )],
            required => [qw( author_name author_email content )],
            properties => {
                id => { type => 'integer', readOnly => 1 },
                blog_id => { type => 'integer' },
                author_name => { type => 'string' },
                author_email => { type => 'string' },
                content => { type => 'string' },
            },
        },
    },
};
With our blog_comment collection, we're also using the
x-list-columns value to set which columns are shown in Yancy's list
view. This way we can easily see the author information while we're
perusing the list.
Next, we need a way for users to add new comments to a blog post. For
this, we'll need a form, and a route that accepts the form contents and
adds the comment to the database.
First, the route. The route will accept three form parameters:
author_name, author_email, and content. Then we need to set the
correct blog_id. With the data ready, we can use the yancy.create
helper
to write the new comment. This helper will validate our data according
to our configuration and throw an exception if it's invalid. Finally,
we can redirect the user back to the front page of the blog.
post '/blog/:id/comment' => sub {
    my ( $c ) = @_;
    # Create the new comment
    my %item;
    for my $field (qw( author_name author_email content )) {
        $item{ $field } = $c->param( $field );
    }
    $item{ blog_id } = $c->stash( 'id' );
    eval { $c->yancy->create( blog_comment => \%item ) };
    if ( $@ ) {
        return $c->render(
            status => 400,
            text => "Error adding comment: $@",
        );
    }
    # Back to the blog
    $c->res->headers->location( '/' );
    return $c->rendered( status => 302 );
};
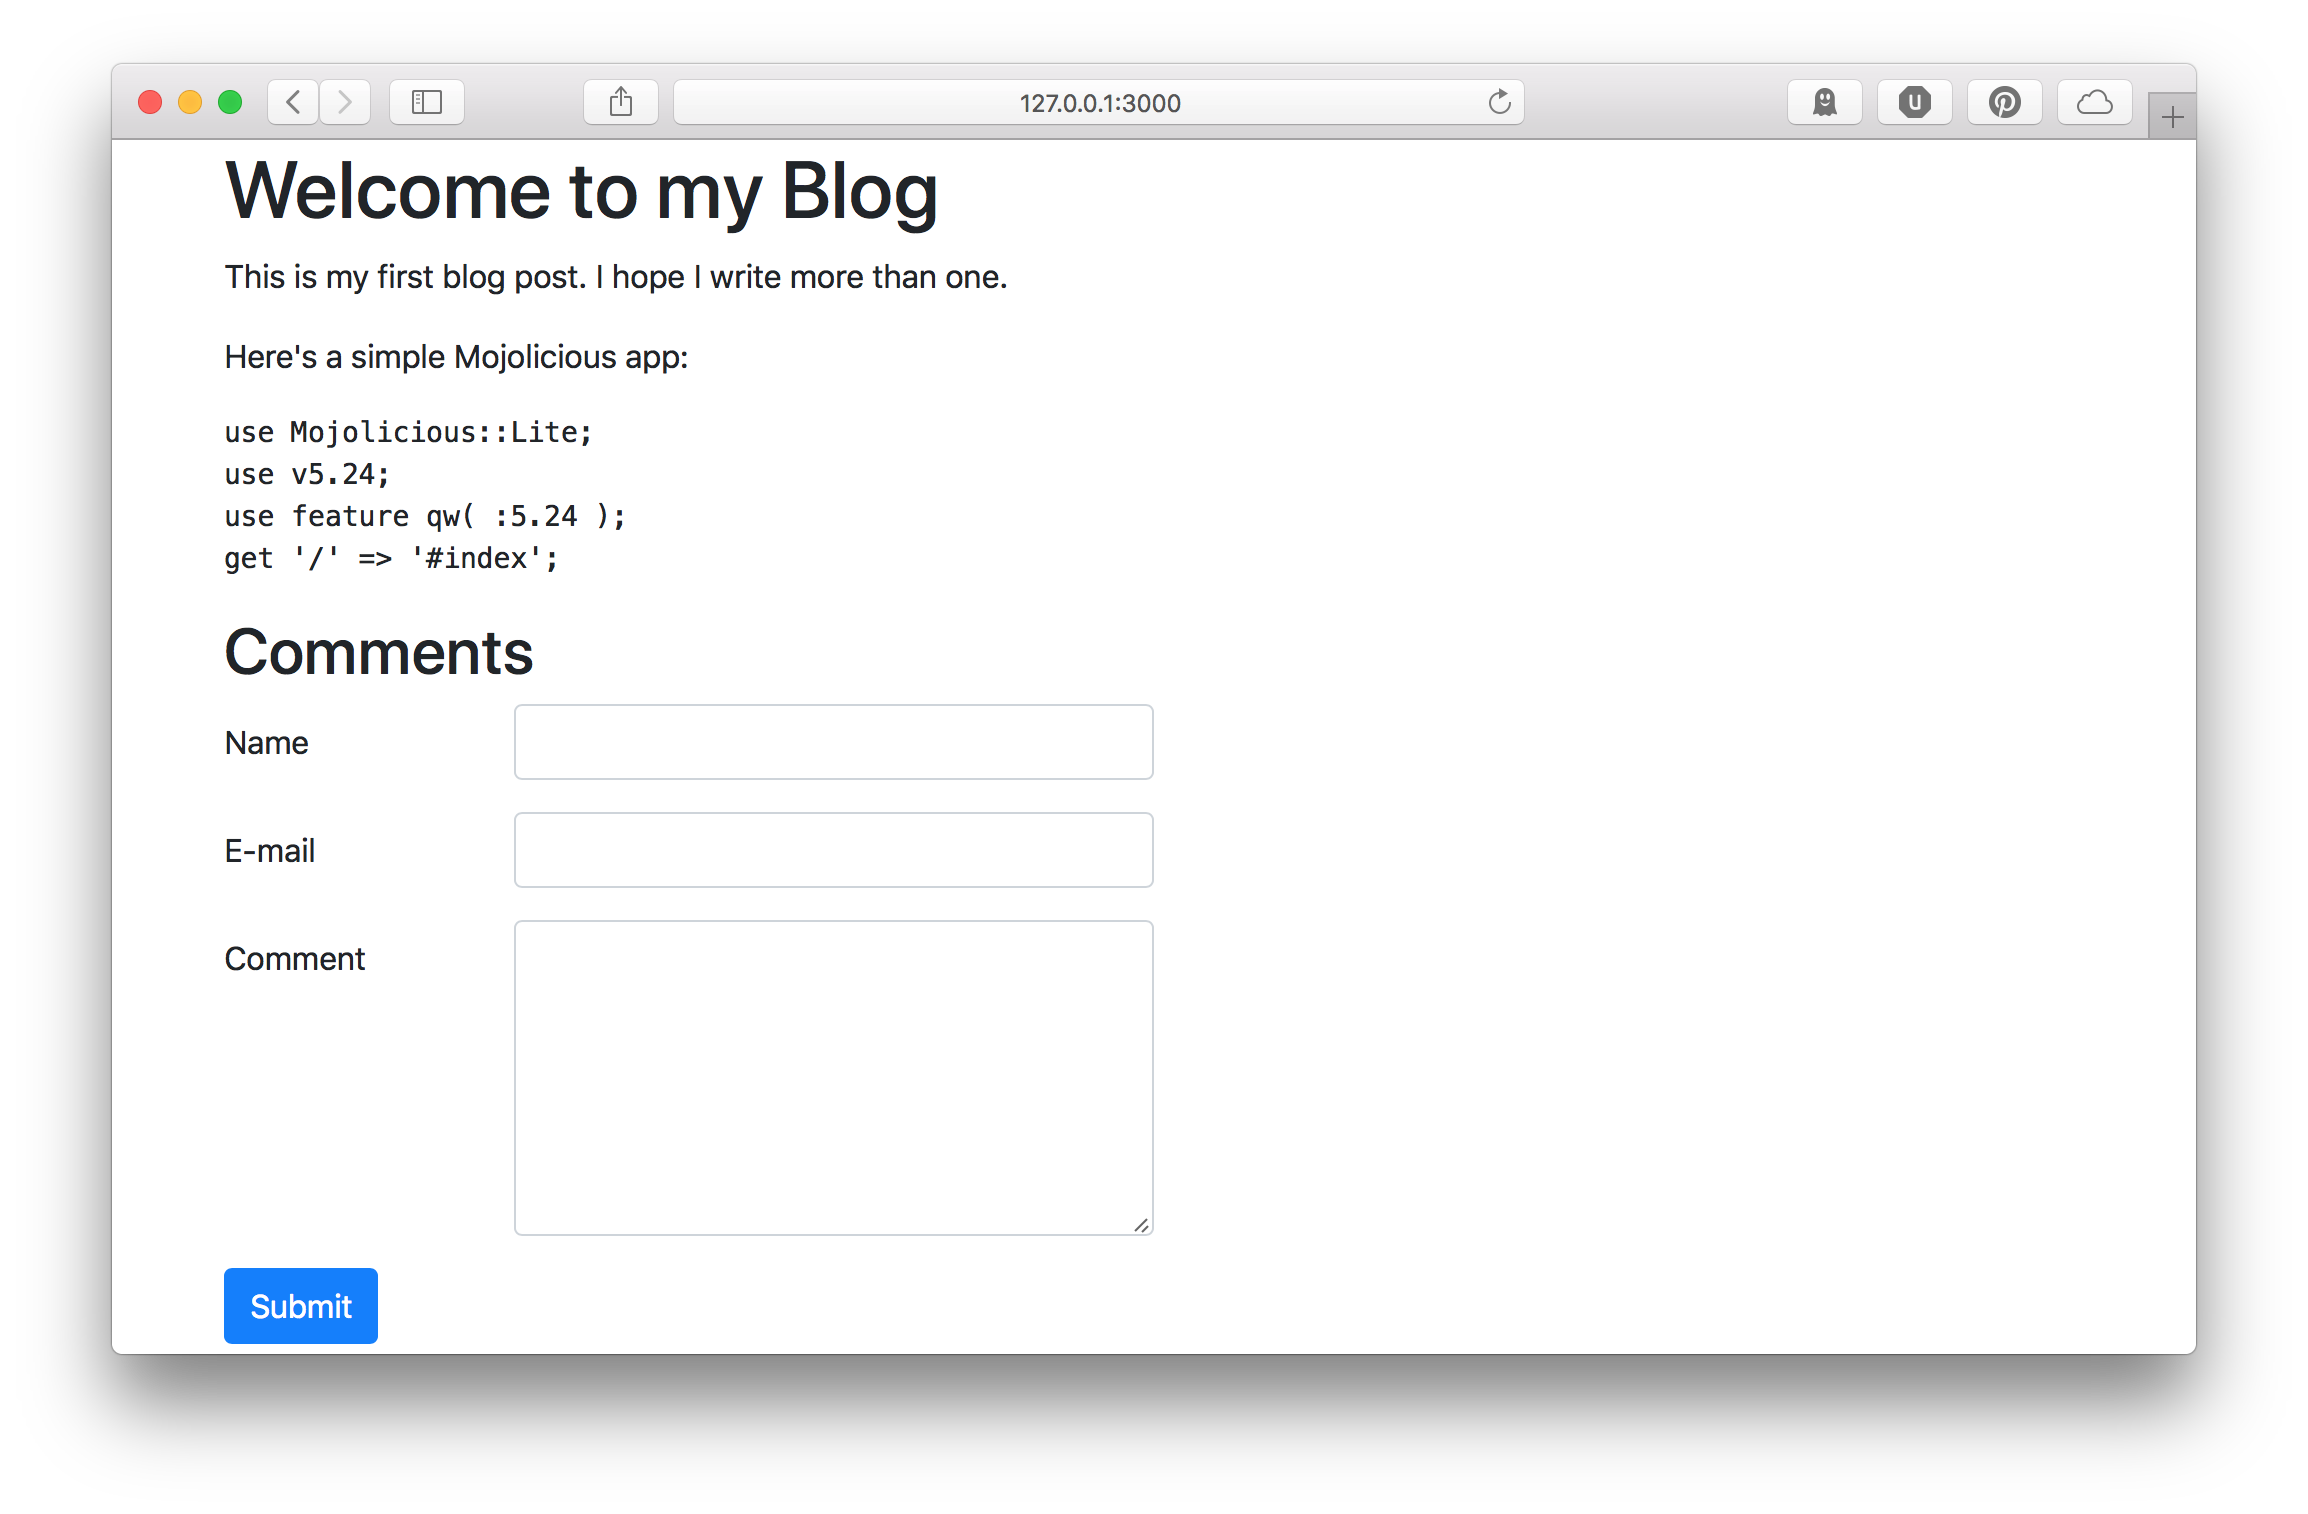
Now we need a form. We'll use Bootstrap to make it look nice.
% for my $post ( @{ stash 'posts' } ) {
    <%== $post->{html} %>
    <h2>Comments</h2>
    <form class="form" method="post" action="/blog/<%= $post->{id} %>/comment">
        <div class="form-group row">
            <label class="col-form-label col-2">Name</label>
            <input name="author_name" class="form-control col-4" />
        </div>
        <div class="form-group row">
            <label class="col-form-label col-2">E-mail</label>
            <input name="author_email" class="form-control col-4" />
        </div>
        <div class="form-group row">
            <label class="col-form-label col-2">Comment</label>
            <textarea name="content" rows="6" class="form-control col-4"></textarea>
        </div>
        <button class="btn btn-primary">Submit</button>
    </form>
% }

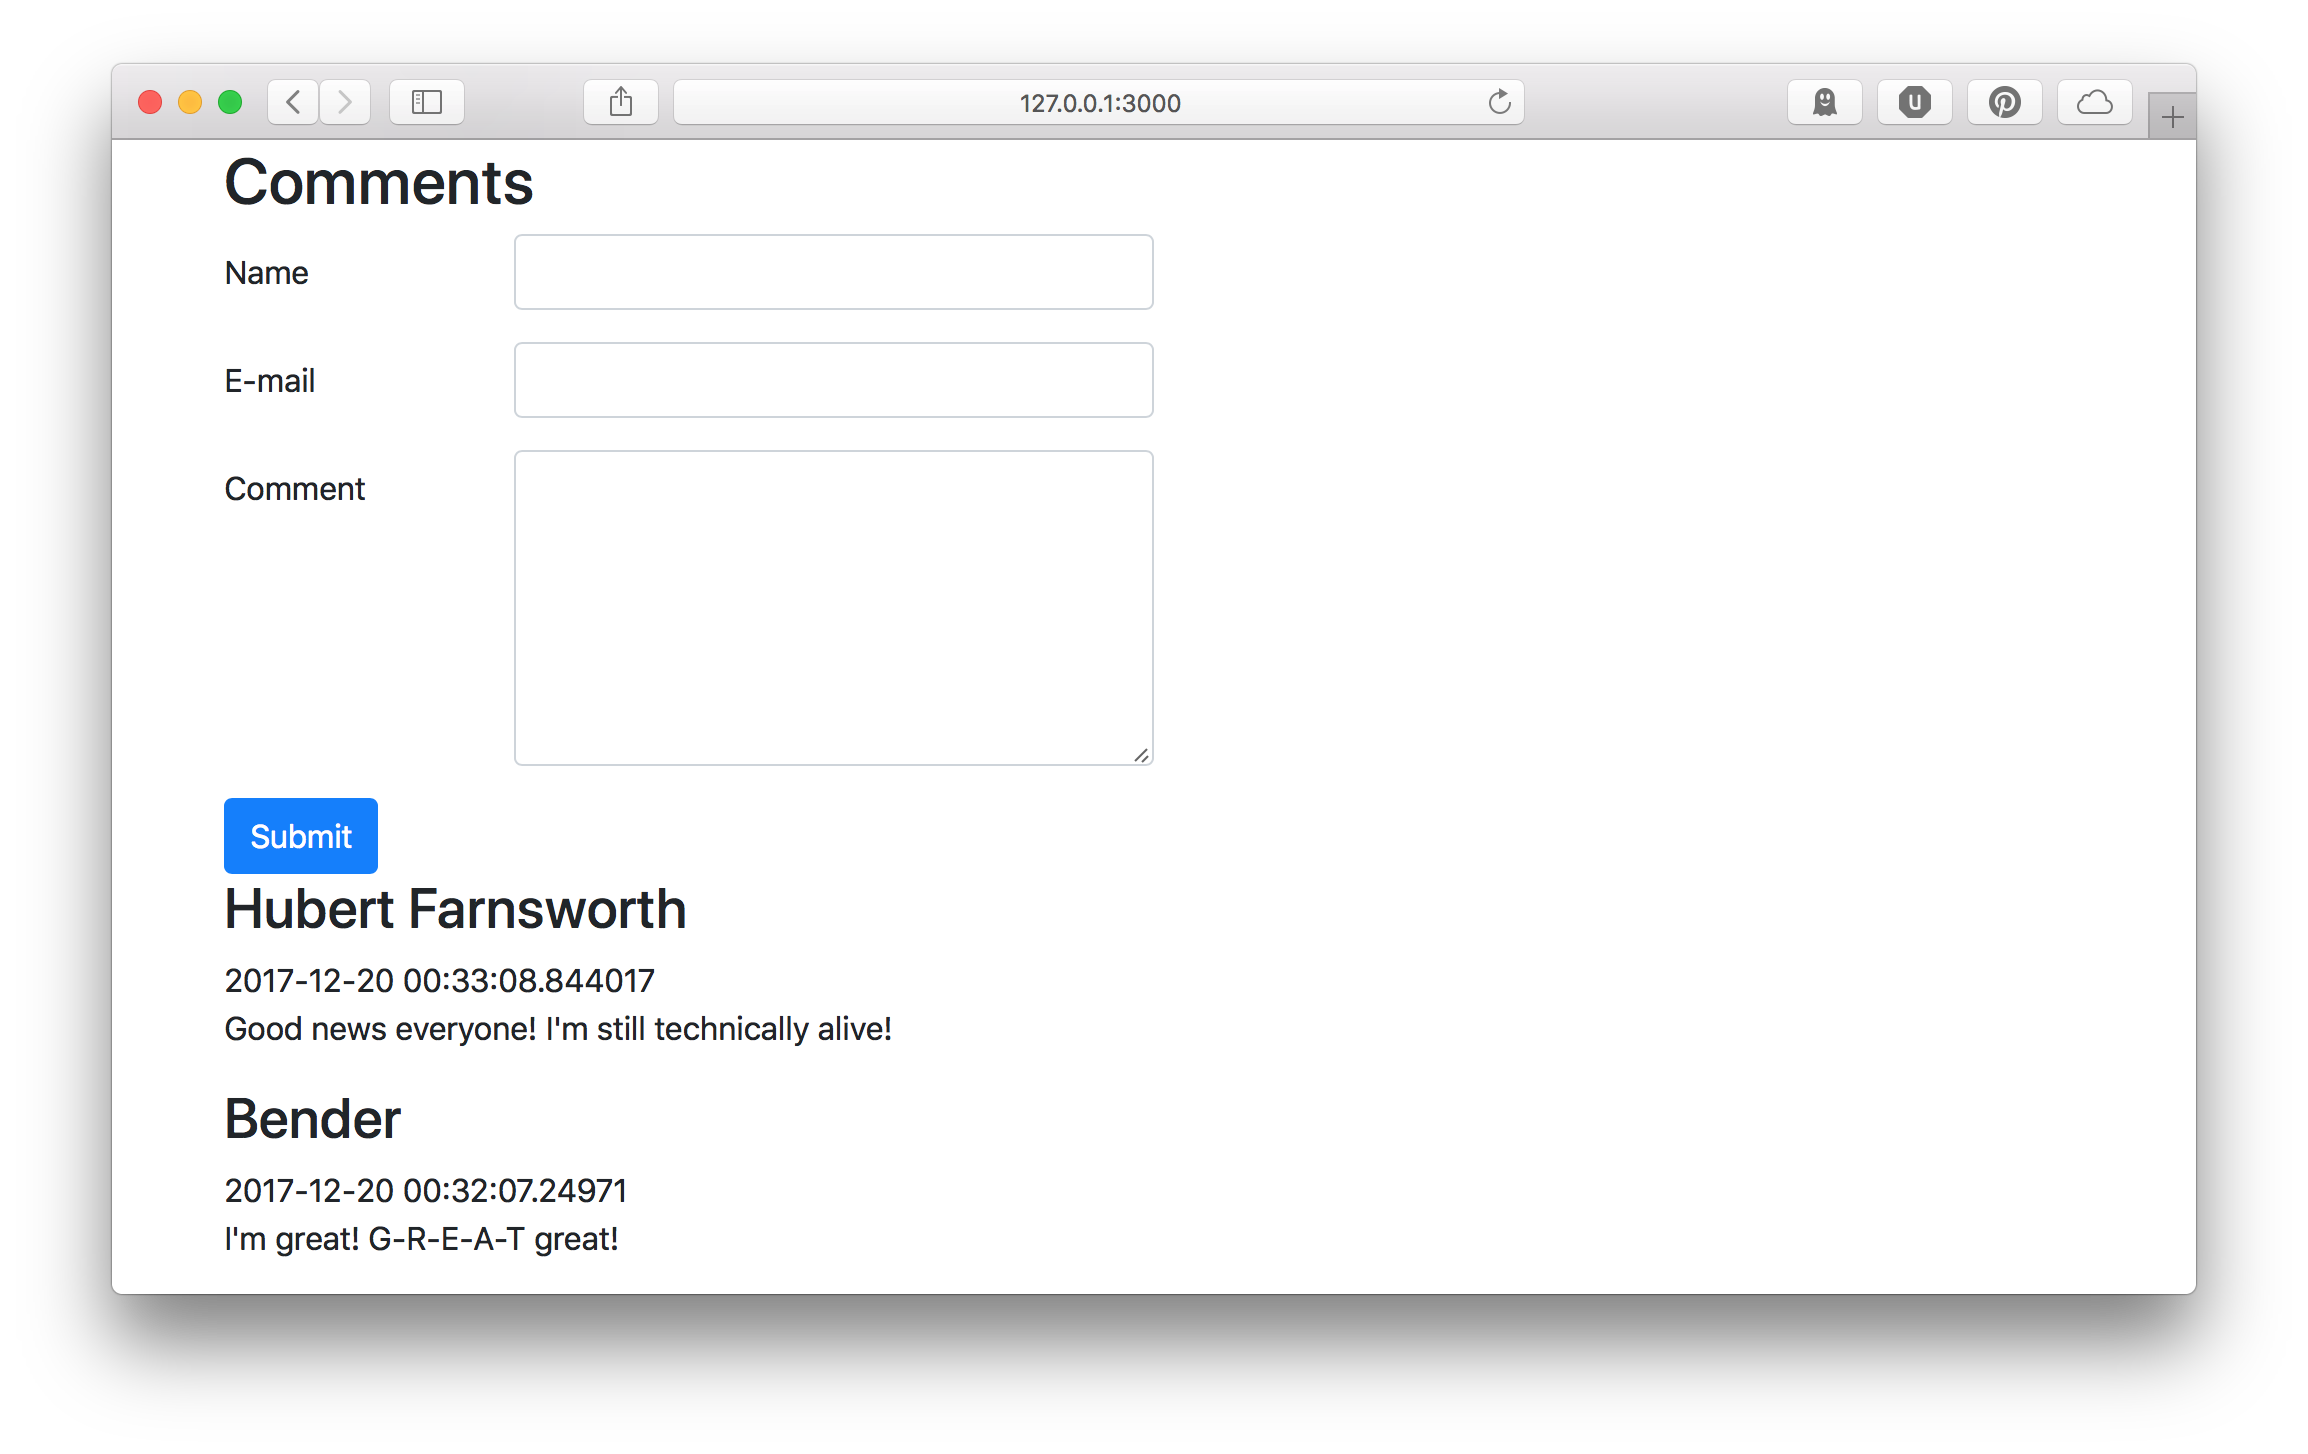
Finally, we need to display the comments with our posts. We will have to
rewrite our main / route to add the comments to the post data, like
so:
get '/' => sub {
    my ( $c ) = @_;
    # Get posts, latest post first
    my @posts = $c->yancy->list(
        blog => {},
        { order_by => { -desc => 'created' } },
    );
    for my $post ( @posts ) {
        # Add comments to the post, latest comment first
        $post->{comments} = [
            $c->yancy->list(
                blog_comment => { blog_id => $post->{id} },
                { order_by => { -desc => 'created' } },
            )
        ];
    }
    return $c->render( 'index', posts => \@posts );
};
And then we can display our posts in our template:
% for my $comment ( @{ $post->{comments} } ) {
    <h3>
        <%= $comment->{author_name} %>
    </h3>
    <date><%= $comment->{created} %></date>
    <p style="white-space: pre-line"><%= $comment->{content} %></p>
% }

Once we have some comments, we can manage them using Yancy.

Here's the whole code for our blog with comments.
Mojolicious and makes it easy to build a content-based website, and
Yancy makes it easy to manage.
One of my applications is a pure-JavaScript UI for a JSON API. This UI
is an entirely different project that communicates with a public API
using an OpenAPI specification.
Our public API is huge and complex: To set up the public API, I need
a database, sample data, and three other private API servers that
perform individual tasks as directed by the public API. Worse, I would
need to set up a lot of different test scenarios with different kinds of
data.
It would be a lot easier to set up a mock public API that I could use to
test my UI, and it turns out that Mojolicious makes this very easy.
So let's set up a simple Mojolicious::Lite app that responds to a path
with a JSON response:
use Mojolicious::Lite;
get '/servers' => sub {
my ( $c ) = @_;
return $c->render(
json => [
{ ip => '10.0.0.1', os => 'Debian 9' },
{ ip => '10.0.0.2', os => 'Debian 8' }
],
);
};
app->start;
Now I can fetch that JSON response by starting the web application and
going to /servers or by using the get command:
$ perl test-api.pl get /servers
[{"ip":"10.0.0.1","os":"Debian 9"},{"ip":"10.0.0.2","os":"Debian 8"}

$ perl test-api.pl daemon
Server available at http://127.0.0.1:3000
That's pretty easy and shows how easy Mojolicious can be to get started.
But I have dozens of routes in my application! Combined with all the
possible data and its thousands of routes. How do I make all of them
work without copy-pasting code for every single route?
Let's match the whole path of the route and then create a template with
the given path. Mojolicious lets us match the whole path using the *
placeholder in the route path. Then we can use that path to look up the
template, which we'll put in the __DATA__ section.
use Mojolicious::Lite;
any '/*path' => sub {
my ( $c ) = @_;
return $c->render(
template => $c->stash( 'path' ),
format => 'json',
);
};
app->start;
__DATA__
@@ servers.json.ep
[
{ "ip": "10.0.0.1", "os": "Debian 9" },
{ "ip": "10.0.0.2", "os": "Debian 8" }
]
Again, we can use the get command to test that we get the right data:
$ perl test-api.pl get /servers
[
    { "ip": "10.0.0.1", "os": "Debian 9" },
    { "ip": "10.0.0.2", "os": "Debian 8" }
]
So now I can write a bunch of JSON in my script and it will be exposed
as an API. But I'd like it to be easier to make lists of things: REST
APIs often have one endpoint as a list and another as an individual item
in that list. We can make a list by composing our individual parts using
Mojolicious templates and the include template helper:
use Mojolicious::Lite;
any '/*path' => sub {
my ( $c ) = @_;
return $c->render(
template => $c->stash( 'path' ),
format => 'json',
);
};
app->start;
__DATA__
@@ servers.json.ep
[
<%= include 'servers/1' %>,
<%= include 'servers/2' %>
]
@@ servers/1.json.ep
{ "ip": "10.0.0.1", "os": "Debian 9" }
@@ servers/2.json.ep
{ "ip": "10.0.0.2", "os": "Debian 8" }
Now I can test the list endpoint again:
$ perl test-api.pl get /servers
[
    { "ip": "10.0.0.1", "os": "Debian 9" }
,
    { "ip": "10.0.0.2", "os": "Debian 8" }
]
And also one of the individual item endpoints:
$ perl test-api.pl get /servers/1
{ "ip": "10.0.0.1", "os": "Debian 9" }
Currently we handle all request methods (GET, POST, PUT, DELETE)
the same, but my API doesn't work like that. So, I need to be able to
provide different data for different request methods. To do that, let's add the
request method to the template path:
use Mojolicious::Lite;
any '/*path' => sub {
my ( $c ) = @_;
return $c->render(
template => join( '/', uc $c->req->method, $c->stash( 'path' ) ),
format => 'json',
);
};
app->start;
__DATA__
@@ GET/servers.json.ep
[
<%= include 'get/servers/1' %>,
<%= include 'get/servers/2' %>
]
@@ GET/servers/1.json.ep
{ "ip": "10.0.0.1", "os": "Debian 9" }
@@ GET/servers/2.json.ep
{ "ip": "10.0.0.2", "os": "Debian 8" }
@@ POST/servers.json.ep
{ "status": "success", "id": 3, "server": <%== $c->req->body %> }
Now all our template paths start with the HTTP request method (GET),
allowing us to add different routes for POST requests and other HTTP
methods.
We also added a POST/servers.json.ep template that shows us getting
a successful response from adding a new server via the API. It even
correctly gives us back the data we submitted, like our original API
might do.
We can test our added POST /servers method with the get command
again:
$ perl test-api.pl get -M POST -c '{ "ip": "10.0.0.3" }' /servers
{ "status": "success", "id": 3, "server": { "ip": "10.0.0.3" } }
Now what if I want to test what happens when the API gives me an error?
Mojolicious has an easy way to layer on additional templates to use for
certain routes: Template
variants.
These variant templates will be used instead of the original template,
but only if they are available. Read more on how to use template
variants yesterday on the advent
calendar.
By setting the template variant to the application "mode", we can easily
switch between multiple sets of templates by adding -m <mode> to the
command we run.
use Mojolicious::Lite;
any '/*path' => sub {
my ( $c ) = @_;
return $c->render(
template => join( '/', uc $c->req->method, $c->stash( 'path' ) ),
variant => $c->app->mode,
format => 'json',
);
};
app->start;
__DATA__
@@ GET/servers.json.ep
[
<%= include 'get/servers/1' %>,
<%= include 'get/servers/2' %>
]
@@ GET/servers/1.json.ep
{ "ip": "10.0.0.1", "os": "Debian 9" }
@@ GET/servers/2.json.ep
{ "ip": "10.0.0.2", "os": "Debian 8" }
@@ POST/servers.json.ep
{ "status": "success", "id": 3, "server": <%== $c->req->body %> }
@@ POST/servers.json+error.ep
% $c->res->code( 400 );
{ "status": "error", "error": "Bad request" }
$ perl test-api.pl get -m error -M POST -c '{}' /servers
{ "status": "error", "error": "Bad request" }
And finally, since I'm using this to test an AJAX web application,
I need to allow the preflight OPTIONS request to succeed and I need to
make sure that all of the correct Access-Control-* headers are set
to allow for cross-origin requests.
use Mojolicious::Lite;
hook after_build_tx => sub {
my ($tx, $app) = @_;
$tx->res->headers->header( 'Access-Control-Allow-Origin' => '*' );
$tx->res->headers->header( 'Access-Control-Allow-Methods' => 'GET, POST, PUT, PATCH, DELETE, OPTIONS' );
$tx->res->headers->header( 'Access-Control-Max-Age' => 3600 );
$tx->res->headers->header( 'Access-Control-Allow-Headers' => 'Content-Type, Authorization, X-Requested-With' );
};
any '/*path' => sub {
my ( $c ) = @_;
return $c->rendered( 204 ) if $c->req->method eq 'OPTIONS';
return $c->render(
template => join( '/', uc $c->req->method, $c->stash( 'path' ) ),
variant => $c->app->mode,
format => 'json',
);
};
app->start;
__DATA__
@@ GET/servers.json.ep
[
<%= include 'get/servers/1' %>,
<%= include 'get/servers/2' %>
]
@@ GET/servers/1.json.ep
{ "ip": "10.0.0.1", "os": "Debian 9" }
@@ GET/servers/2.json.ep
{ "ip": "10.0.0.2", "os": "Debian 8" }
@@ POST/servers.json.ep
{ "status": "success", "id": 3, "server": <%== $c->req->body %> }
@@ POST/servers.json+error.ep
% $c->res->code( 400 );
{ "status": "error", "error": "Bad request" }
Now I have 20 lines of code that can be made to mock any JSON API
I write. Mojolicious makes everything easy!
CPAN Testers is a pretty big project with a long,
storied history. At its heart is a data warehouse holding all the test reports
made by people installing CPAN modules. Around that exists an ecosystem of
tools and visualizations that use this data to provide useful insight into the
status of CPAN distributions.
For the CPAN Testers webapp
project, I needed a way to
show off some pre-release tools with some context about what they are and how
they might be made ready for release. I needed a "beta" website with a front
page that introduced the beta projects. But, I also needed the same
Mojolicious application to serve (in the future) as a
production website. The front page of the production website would be
completely different from the front page of the beta testing website.
To achieve this, I used Mojolicious's template variants
feature.
First, I created a variant of my index.html template for my beta site
and called it index.html+beta.ep.
<h1>CPAN Testers Beta</h1>
<p>This site shows off some new features currently being tested.</p>
<h2><a href="/chart.html">Release Dashboard</a></h2>
Next, I told Mojolicious to use the "beta" variant when in "beta" mode
by passing $app->mode to the variant stash variable.
use Mojolicious::Lite;
get '/*path', { path => 'index' }, sub {
my ( $c ) = @_;
return $c->render(
template => $c->stash( 'path' ),
variant => $c->app->mode,
);
};
app->start;
The mode is set by passing the -m beta option to Mojolicious's daemon or
prefork command.
$ perl myapp.pl daemon -m beta
This gives me the new landing page for beta.cpantesters.org.
$ perl myapp.pl get / -m beta
<h1>CPAN Testers Beta</h1>
<p>This site shows off some new features currently being tested.</p>
<h2><a href="/chart.html">Release Dashboard</a></h2>
But now I also need to replace the original landing page (index.html.ep)
so it can still be seen on the beta website. I do this with a simple
trick: I created a new template called web.html+beta.ep that imports
the original template and unsets the variant stash variable. Now
I can see the main index page on the beta site at
http://beta.cpantesters.org/web.
%= include 'index', variant => undef
$ perl myapp.pl get /web -m beta
<h1>CPAN Testers</h1>
<p>This is the main CPAN Testers application.</p>
Template variants are a useful feature in some edge cases, and this isn't the
first time I've found a good use for them. I've also used them to provide a
different layout template in "development" mode to display a banner saying
"You're on the development site". Useful for folks who are undergoing user
acceptance testing. The best part is that if the desired variant for that
specific template is not found, Mojolicious falls back to the main template. I
built a mock JSON API application which made extensive use of this fallback
feature, but that's another blog post for another time.


